Glossary of Metal detecting Terms

All Metal: a non-discriminate control setting that  accepts detection of all metal objects, including ferrous (i.e.  iron-containing) ground minerals.

Audio ID: also known as tone ID, this metal detector feature  identifies targets via a tone that corresponds to their conductivity.

Cache: a group of objects that has been  intentionally hidden or buried.

Clad: a term for coins that are  still in circulation. With clad coins, a surface metal covers or clads a  base metal. Pennies, for example, used to be made from copper, but are  now copper-clad zinc.

Coil: also known as the head, loop,  or antenna, a coil is the metal-sensing part of a metal detector.

Coin Shooting: a slang term for coin hunting, or going  detecting specifically in search of coins.

Concentric Coil: concentric means “having a common  center.” Concentric search coils feature circular transmit and receive  windings of unequal diameters that are aligned on a common center,  producing a cone-shaped search matrix. If the wire coils/windings of a  concentric coil are on the same plane, it’s referred to as coplanar  concentric.

Conductivity: conductivity refers to how well a target allows electrical current to flow through it. For example, electrical currents freely flow around a highly conductive coin when energized by the electromagnetic field from a metal detector.

Discrimination: discrimination is a metal detector’s ability to identify buried targets based on conductive and/or ferrous properties. Based on measuring these properties, it is possible to determine valuable targets from junk targets so you can spend more time digging valuable targets.

Electromagnetic Field: an electromagnetic field is an  invisible matrix created by electrically charged objects. In metal  detectors, the electrical current moving through the transmitter coil of  the search head produces an electromagnetic field, and this field  extends to a depth perpendicular to the size of the coil. When the field  encounters metals, they generate their own fields, which can be  measured by a metal detector’s receiver coil.

Elliptical Coil: an ellipse is an extended oval shape  resembling a flattened circle. A search coil in this shape is called an  elliptical coil. Elliptical metal detector coils can be either  concentric or widescan.

Ferrous: ferrous objects (targets) contain iron and therefore are attracted to a magnet (nails, tin cans, horseshoes, etc.). Many natural and man-made objects contain iron, most of these are junk targets, although some could be valuable relics. Non-ferrous materials do not contain iron. Good targets include coins, gold rings, and copper artifacts. Examples of junk targets are bottle tops, pull tabs, and aluminum foil.

Frequency: frequency refers to how fast a metal detector sends signals into the ground. Frequency is measured in Hertz (Hz). Certain frequencies detect certain targets better than others, e.g., high frequencies find very small targets while low frequencies find deeper/larger targets.

Ground Balance: soil often contains ground  minerals,  magnetic  material composed of ferric oxide and other metals.  These  iron-bearing  materials cause loss of depth in a metal detector.  Ground  balance is  the ability to manually or electronically ignore/neutralize these  signals (sometimes called ground tracking or   ground reject).


    Ground Mineralization: naturally occurring minerals in the ground that affect a metal detector’s performance. There are two main types of ground mineralization: one is due to iron particles and can be identified by its red coloration; the other is due to salt, such as salt water beaches. Iron particle mineralization causes the ground to become magnetic and salt mineralization causes the ground to become conductive. Both forms of ground mineralization can produce false signals that mask targets. The ground mineralization illustration shows minerals in the ground producing a response to the metal detector’s electromagnetic field.

    Masking:   masking occurs when ground  minerals or buried  objects interfere with  the detection of a legitimate  find, resulting in  a mixed signal.

    Matrix:  the total detection area  covered  by a search coil’s electromagnetic field.

    Notch:   notch filtering or notch  discrimination is used  to create a range of  accepted and rejected  targets. Setting the notch  level on your metal  detector to discriminate  against certain objects means tuning out or   blocking a particular  frequency band. This is called notch reject.   Conversely, creating a  notch window of accepted frequencies is called   notch accept.

    Null:   when a metal or coin detector coil  passes over  targets that have been  discriminated against or are outside  of the  accepted notch window, a  metal detector’s threshold audio will  go quiet or drop momentarily,  i.e. go null.

    Pinpointing: refers  to the act of   determining the precise location of a target. This can  be accomplished   by manually “detuning” a metal detector, or adjusting  it to be less   sensitive, and then sweeping the target response area  again. Because the   metal detector is less sensitive after detuning, an  audio signal  should  provide a more exact location due to the strength  of the signal.

    Prospecting: treasure hunting with a metal  detector in search of gold, silver, or valuables.

    Relic Hunting: metal detecting  in quest of  objects that possess historical (and sometimes also monetary) value.

    Sweep:   the motion a metal detectorist  employs when using a  metal detector,  it usually resembles the  side-to-side  movement used when sweeping a  floor.

    Target: any metal object that can be detected by a metal detector. A target can be either valuable, such as coins, or junk like a bottle cap.

    Target ID: numbers and audio tones are produced by a metal detector to enable you to identify targets based on their conductive and/or ferrous properties.

    Threshold:   the threshold is essentially  status quo for  the listening  detectorist. The threshold is a  continuous, faint tone  that provides  an audible reference point for  ground-balancing a  detector. It also  determines the minimum sound level  for pinpointing  targets, including  deep targets in discriminate mode.

Categories: Metal Detecting Tips | Tags: , , | Leave a comment

The Acid Test Kit


Anyone that is serious about their metal detecting should have an Acid Test Kit, and I personally can't imaging not having one. I can't tell you how many times I dug a ring or other item and I wasn't absolutely sure of the metal content.

Ever since I purchased one of theses Acid Test Kits that has not been a problem, and I have discovered a number of pieces of jewelry that I had were silver or of a certain karat of gold. You will find that many older pieces of jewelry don't have any markings, or a custom hand made piece might not be marked.

This kit is a must have for anyone swinging a metal detector and they are reasonably priced at Amazon. Here I have posted a nice kit that has the scratching board and a scale for a decent price. I also am posting an Acid Test Kit without the scale that I think is very reasonably priced that also includes an acid for platinum, and another that includes a diamond tester, scale and jeweler's loop, that is also very reasonably priced.


.

If you purchase a kit and are new at acid testing be sure to read the directions and the precautions very carefully.

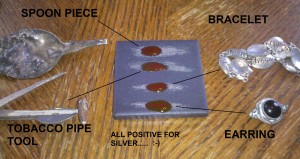
Below is a picture of the results of a silver acid test that I conducted on 4 different items that I found while metal detecting. As you can see I scratched each item on the testing stone and then put a couple of drops of the silver acid on the scratchings.

What you need to look for with silver is that the scratching on the scratch test stone does not dissolve completely and turns a red or magenta color. The brighter the red it turns the more pure the silver. In my test below you can also see the bright reddish color that the acid test produced telling me that all 4 items were 925 quality silver.

Silver acid test

The kits above contain 10k, 14k, 18k, and 22k gold, platinum and silver acids. With the gold test you should start with the acid strength that you think represents what your jewelry find is. So if you think a ring is 10k then start with 10k, if you think it is 14k then start with the 14k acid, etc.

If you scratch a 10k sample on the test stone then put a drop of 10k acid on it, there should be no reaction if it is 10k gold. If it dissolves then it is probably not gold. If it doesn't dissolve, then put a 14k drop on a new, or different part of the scratched gold, if it then dissolves it is 10k gold.

If it doesn't dissolve move up to the next acid (18k) and if it dissolves then, it is 14k gold and so on.

Remember to be careful using the acids and to carefully wipe or rinse the acid off. I also highly recommend wearing some rubber gloves while conducting any acid test. Remember to follow all the instructions carefully that come with the acid kits.

Good luck!


Categories: Metal Detecting Tips, Products | Tags: , , , , , , | Leave a comment

How to cut a plug


I want to talk a minute about how to cut a proper plug when digging a target that you found with your metal detector.

It is very important that you take a careful and respectful approach to recovering targets especially when metal detecting on manicured lawns, public parks, or anyplace that is visible to the general public. It is also very important that we leave it as we found it, or even better than we found it, by also taking any trash we come across while searching for treasures.

At the bottom of this post is a link to a video courtesy of Evan from www.gonehuntingforhistory.com showing exactly how to cut a plug and I strongly recommend that you watch this. You can also comment if you like.

Evan's website is also a great place to get other really helpful information and videos that you will probably find interesting.

I hope you enjoy the video and keep coming back for updates.

How to cut a plug video courtesy of Evan from gonehuntingforhistory.com (Thanks Evan)

http://www.youtube.com/watch?feature=player_embedded&v=3BcoHFYdyHo


Categories: Metal Detecting Tips | Tags: , , , , | Leave a comment

Metal Detecting Gloves

Putting your hand in a hole to retrieve an object while metal detecting sounds pretty safe until you grab onto a piece of aluminum can and slice your finger open. I know because I’ve done it!

All to often a beginner will start metal detecting without gloves either thinking they won’t need them or simply not realizing they may need them, only to find out the hard wayfrown.  I can tell you that they are a necessary “tool” for your metal detecting arsenal, and In this post I will list some gloves that I have personally used or others that I know have used and recommend them.


Mechanix Gloves – very popular and not to expensive, these Mechanix Gloves are sturdy and provide much needed protection while metal detecting.

Fits and protects like a second skin. Developed to protect racecar mechanics from cuts, scrapes and abrasions. Unlike ordinary leather gloves, Mechanix gloves provide so much feel you can pick up thin washers. Machine washable Clarino is soft like cotton and wears like leather.

Hidden stitching eliminates snagging. Seamless thumb and index finger. Stretch knit/padded Spandex back. Streamlined elastic cuff with Velcro closure. Comes in all sizes and is machine washable!

Wells Lamont 3214M Work Gloves – Tough abrasive resistant timber grain pigskin palm with stretch spandex back. Lightly padded neoprene knuckle insert. Pigskin leather reinforced fingertips, first finger and thumb. Elastic cuff with hook and loop adjustable closure.

  • Leather: 100% pigskin. Back 96% polyester, 4% spandex. Knuckle Strap: 100% nylon over neoprene. Insulation: 100% polyurethane foam
  • Premium grain high performance pigskin construction
  • Stretch fabric back with neoprene knuckle insert conforms to hand
  • Comfort closure adjustable wrist fits snugly
  • Reinforced leather finger and thumb tips add wear resistence
  • Pigskin leather provides good abrasion resistance, allows great dexterity

Wells Lamont 555L Thick Rubber Coated Winter Lined Glove

•Contents: 100% nylon exclusive of nitrile coating. Linin: 100% acrylic.

•Nylon knit outer shell with a full knit brushed high bulk acrylic liner for cold weather warmth

•Fully coated palm and thumb with a 3/4 back coating of foam nitrile

•Water Resistant – Great flexibility and dexterity for cold weather use

•Precurved design for better fit and comfort and less hand fatigue from use

•Elasticized cuff keeps out the cold


Knit Glove with Textured Latex Coating, 12 pairs

•latex coating provide extra duty

•cotton and rubber coated with Blue latex

•All purpose handling

•Sold By Dozen (12 pairs)

Try this link for many more choices for metal detecting gloves – Wells Lamont gloves

Categories: Products, Tools for target recovery (digging tools) | Tags: , , , | Leave a comment

Home Electrolysis video

I am posting this home electrolysis video that I made while cleaning a few silver rings. If you have never done electrolysis and have always wondered how, then watch this video until the end, it is a little over 9 minutes long.

You can use the same process for cleaning silver coins but I do not recommend it for rare or key-date coins.

Some examples of rings that I have cleaned using electrolysis.

how to clean rings found metal detecting

ring found on the beach

In the video I am cleaning 4 heavily tarnished silver rings ending up with amazing results.

AGAIN, I DO NOT RECOMMEND THIS WITH KEY-DATE OR RARE COINS

As I explain in the video, I make AC to DC, 9 volt adapters for this home electrolysis system. If you decide to make your own, be sure to know which lead is the positive and which is the negative. Always attach the negative clip to the item to be cleaned and the positive (which I used a red clip for) to a stainless steel spoon or similar high carbon steel piece.

Fill a glass with cold water and add a teaspoon of sea salt and stir it together, you can also add a squirt of lemon juice if you like (I did not) for better conductivity. Set the object and the spoon in the glass, without them touching during the process, and plug the adapter in.

I advise doing this near an open window or an outside area because it will produce a gas that may be bothersome to some people. Also periodically check the adapter to be sure that it doesn’t overheat. I found that my adapter usually gets warm after about 30 minutes, so I unplug it for about 15 minutes before the next use..

A ring usually only needs about 10 – 20 minutes of home electrolysis and then a baking soda and water rub with your fingers to become shiny again.

I usually give them a tumble in my Harbor Freight Tumbler for a bit to help polish them up.

Please watch the whole video for the best result and information.

Watch the Electrolysis Video here!


Categories: How to clean finds | Leave a comment

3 Hour stroll on the beach tonight

I took a 3 hour stroll on the beach tonight with my metal detector. It was a beautiful evening with a light breeze and temperature in the 70's. Not too many people on the beach, there were some folks just hanging about and about 3 wind surfers, a few stragglers in the water. I was hitting on a lot of targets and digging lots of clad when I then dug up this copper ring with a yellow CZ stone. It had me going for a second but I quickly realized it wasn't gold and therefore probably a fake stone.

2a

I continued to find targets, a few pennies, dimes, quarters and a couple of matchbox type cars crusted with sand. It was getting pretty dark and I was heading in from near the low-tide line when my last signal from my metal detector was a nice high tone indicating silver or a coin (not a penny).

1a

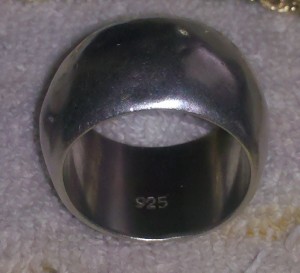
I dug the scoop in and in two scoops plucked the silver ring from the sand. It is a good size band with the word "Amore" on the outside and "Love" on the inside along with a 925 marking. Not a bad few hours of metal detecting on the beach.

Here is a picture of the area of the beach that I focused most of my attention on. It was an area just below were the high tide line meets the sand and it was worn a bit from the tide movement, exsposing some targets.

sand 1

Categories: Pictures of my Metal Detecting Finds | Tags: , , , | Leave a comment

More of my recent Metal Detecting finds

picture of recent finds 925 sterling silver ring found in the wet sand while beach metal detecting
Recent find on a beach Religious medal found on the beach, made of copper
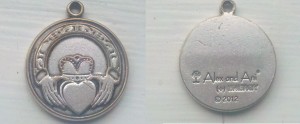
recent metal detecting find Found this Alex & Ani pendant on the beach


Tungsten & gold ring

Tungsten & 14k gold ring found in the wet sand while beach metal detecting


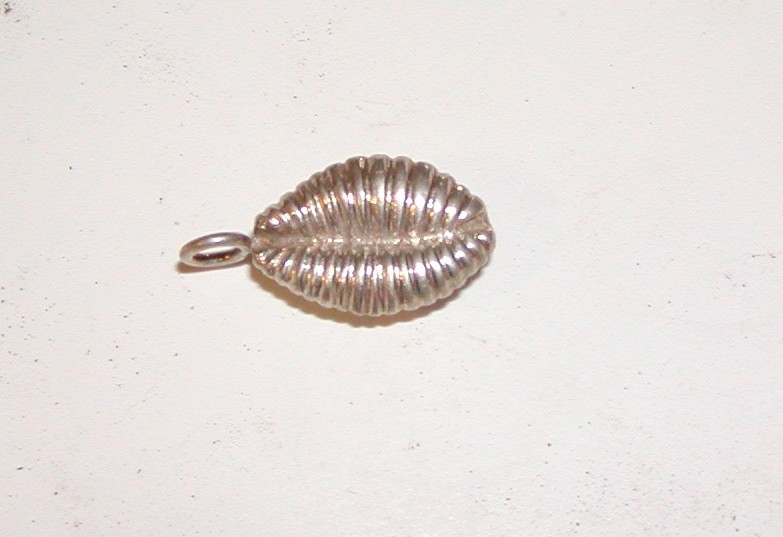
Silver shell

Small silver pendant found in a school field

silver

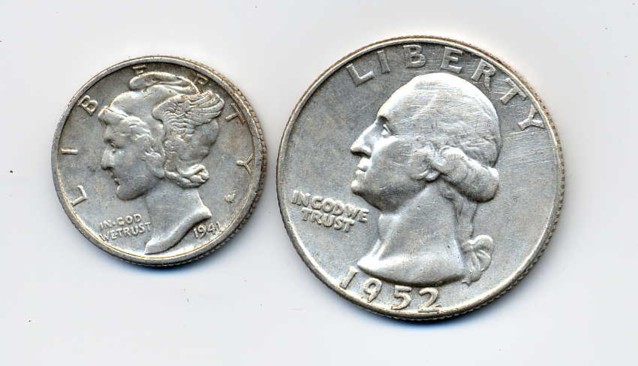
1941 Mercury Dime & 1952 Washington Quarter

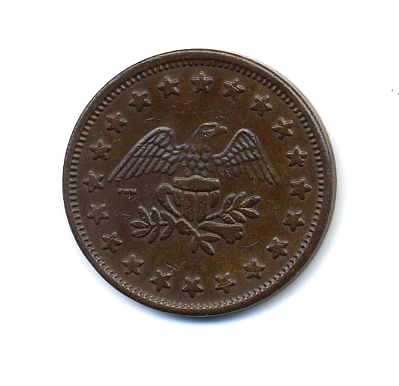
token


Old Token found in a ball-field

ring

Gold filled Signet Ring found in a park

Wed band

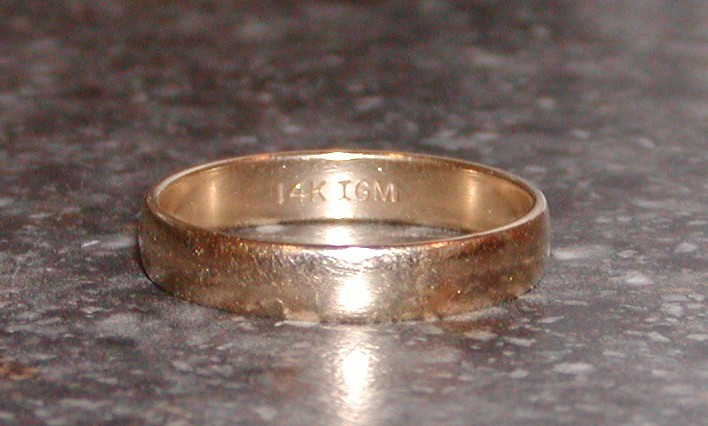
14K Gold Wedding Band – another beach findplat ring

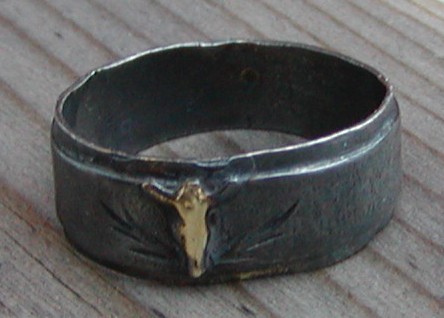
Silver band with 18K gold nugget found while beach metal detecting


IMG_20130501_125246

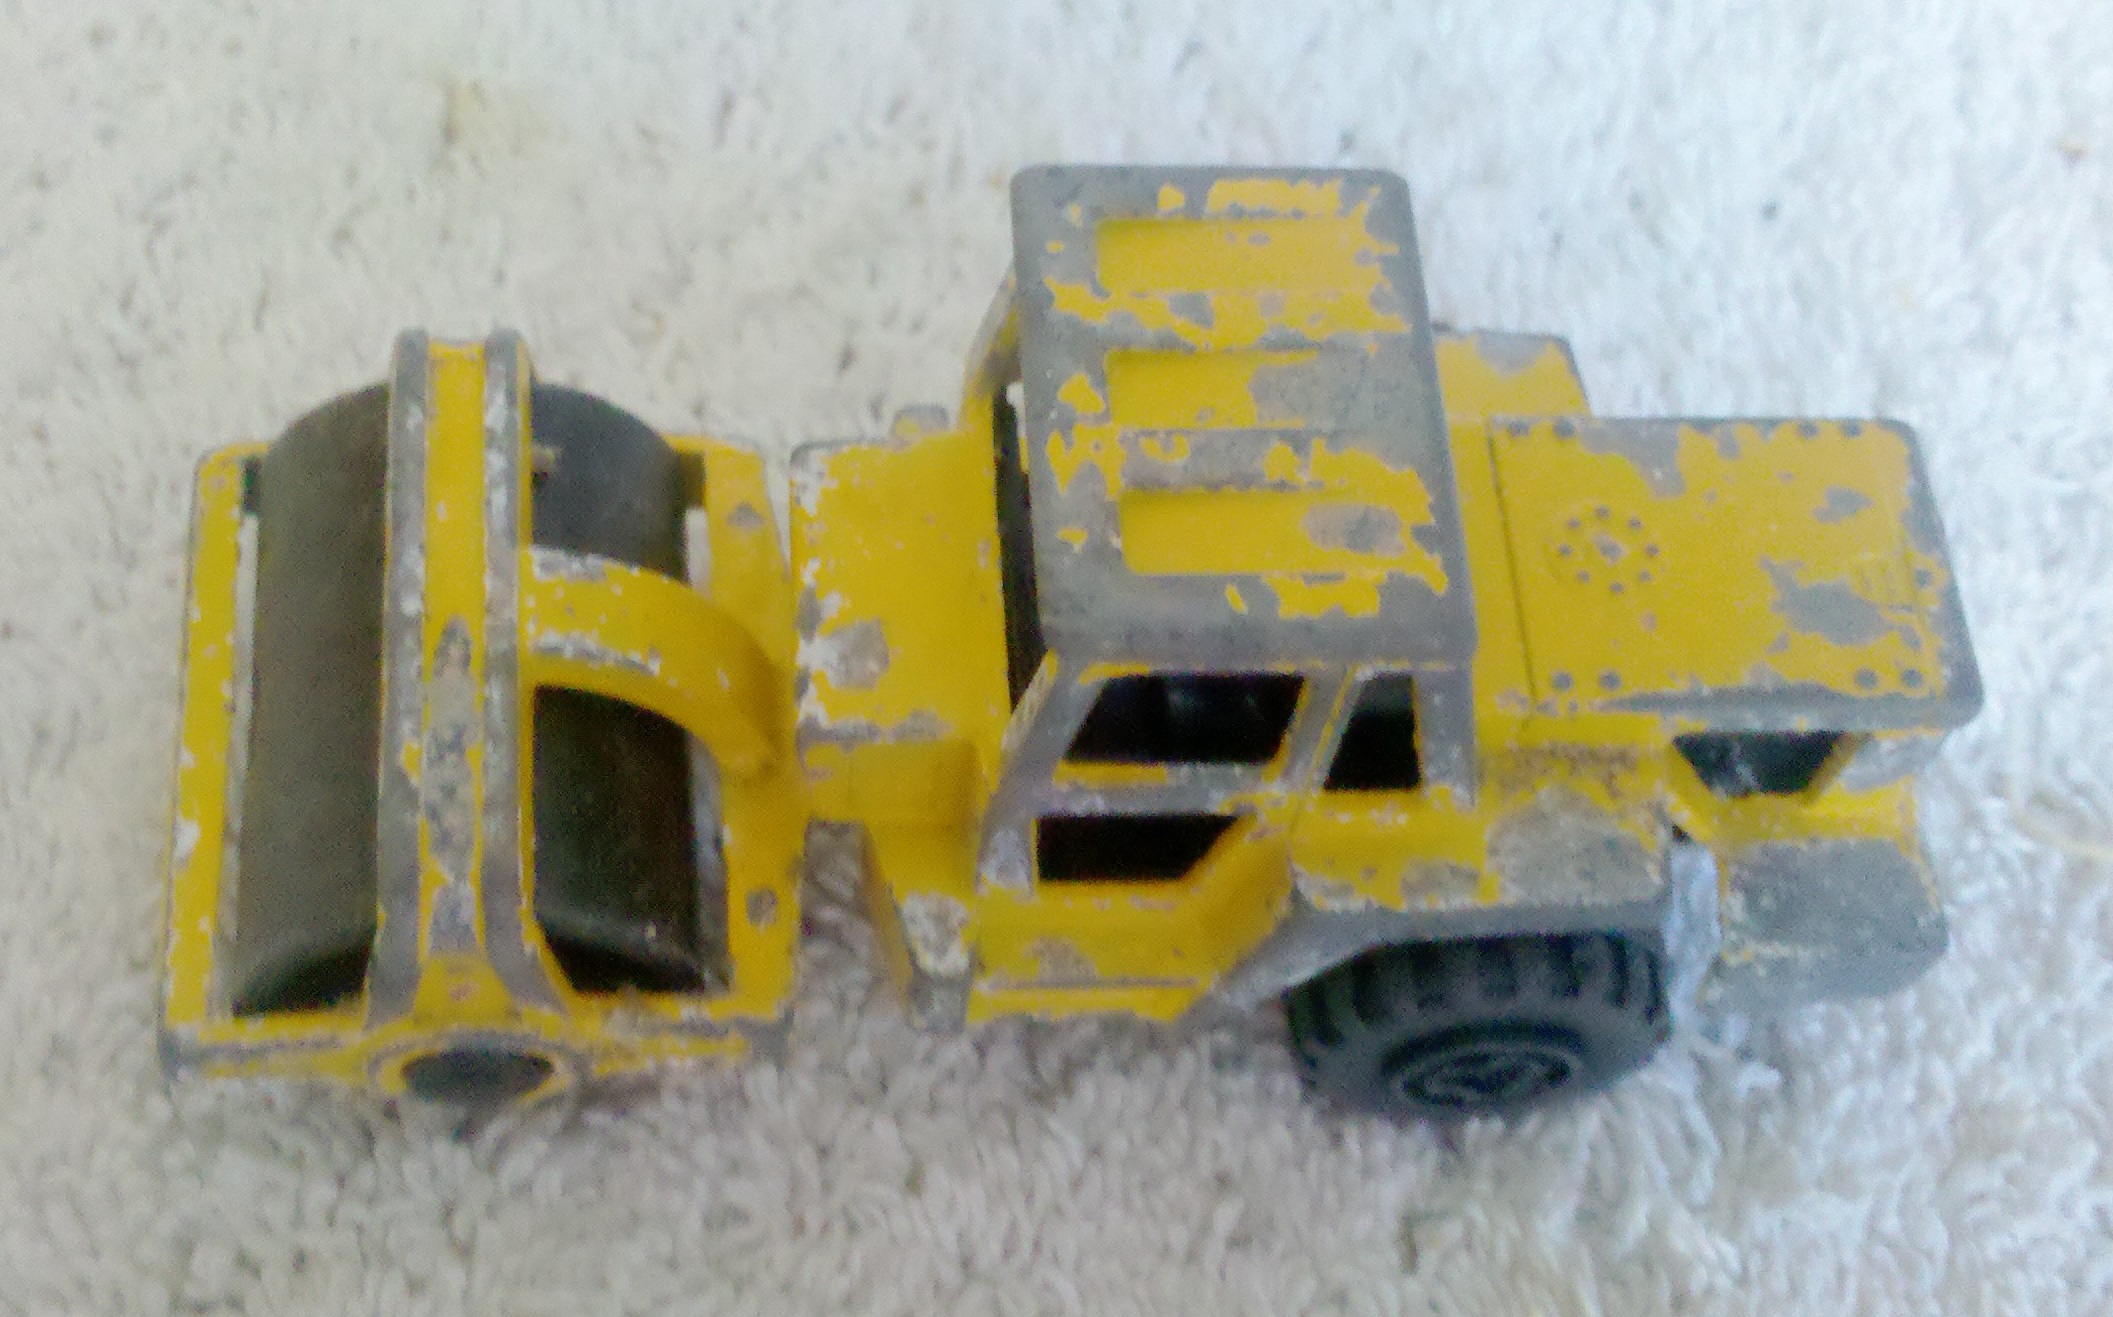
Toy Steam Roller found while beach metal detecting.

2

Big silver and a junk ring found while beach metal detecting

Categories: Pictures of my Metal Detecting Finds | Tags: , , , | Leave a comment

To Tumble or not to Tumble?

To tumble or not to tumble, that is a question that I consider a lot. Obviously the answer for key-date coins is a big NO but clad and other finds, I tumble all the time. In fact when I have coins that I can't see the date on no matter what I do, I will tumble and sometimes I find out after tumbling that I actually had a key-date, or semi-key-date, that I didn't know I had. But that is ok because it wasn't worth anything when I couldn't tell what coin I had in the beginning. I do everything possible to identify a coin without cleaning it but if after I do I still have no idea, I will tumble for a short time, maybe 1 hour in a few drops of Dawn dish detergent and a dash of baking soda. Just enough tumbling to clean them up for spending.

TUMBLED COINS

On a number of occasions I have found V nickels & Indian Head Pennies that I didn't know I had.

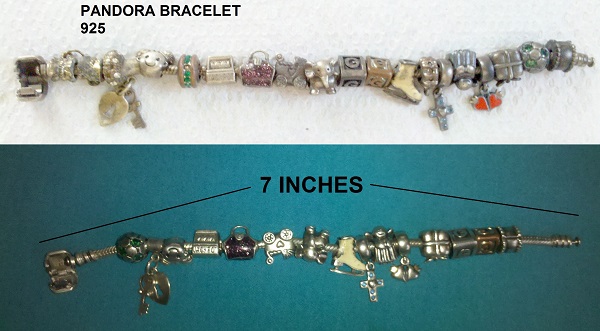
I also tumble jewelry and other metallic finds like, silver rings, necklaces, pendants, etc. with fantastic results. Here is a Pandora Bracelet that I found and tumbled with good results.

Be very careful on items that have paint on them because you might tumble it off if you go to long.

BRACELET FOR WEB


Categories: How to clean finds | Tags: , , , , | Leave a comment

Found & Returned Ring November 2012!

Lost Ring found November 2012:

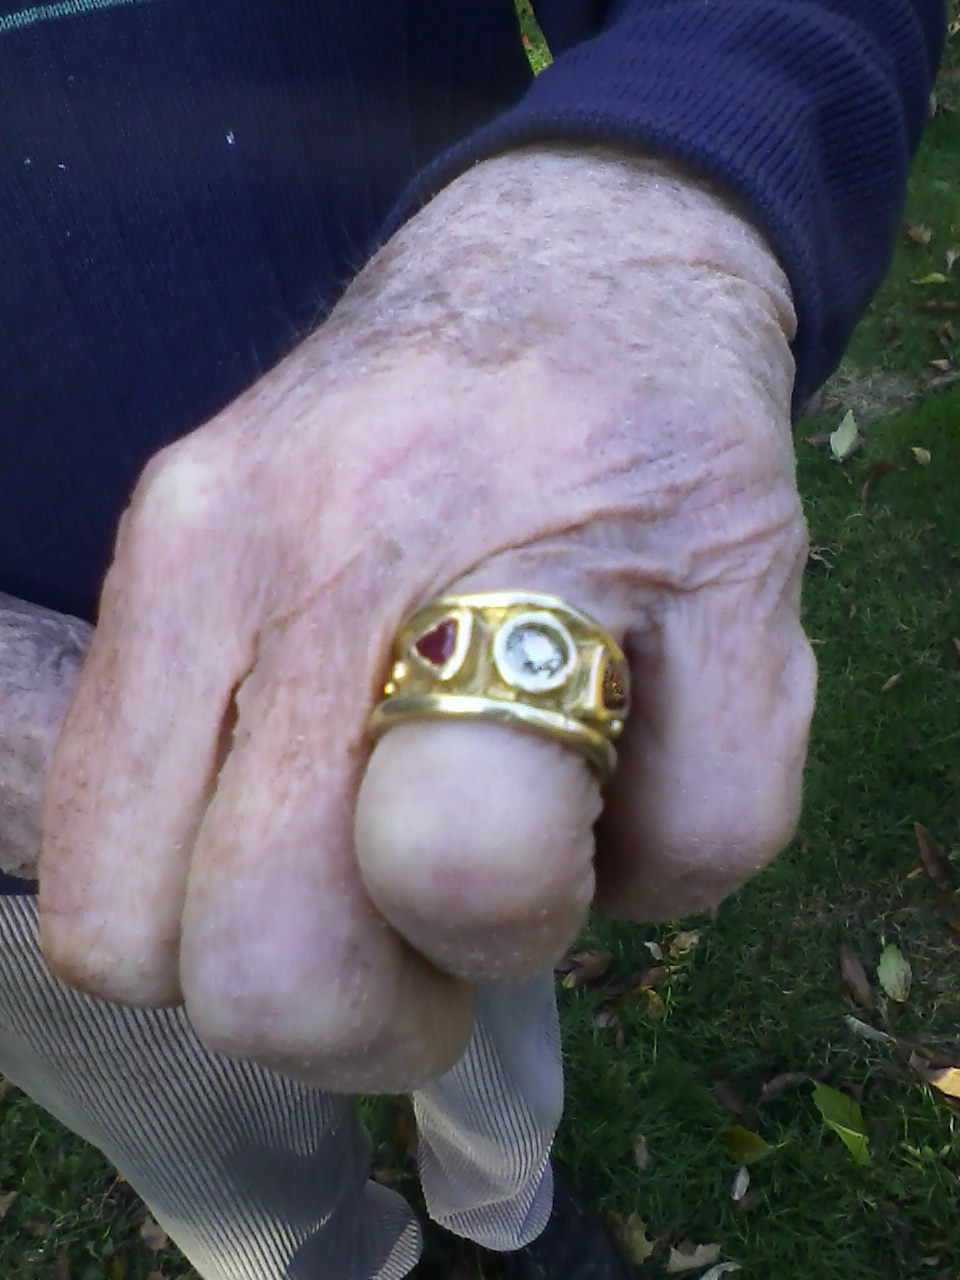
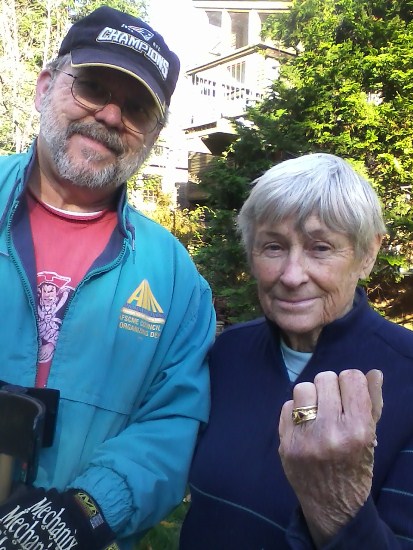
I had the pleasure of helping a very nice lady find a ring that she lost in her yard while raking leaves. I saw her post on Lostmystuff.net, which I am a member of, and I contacted the family to arrange for me to hunt for the lost ring. The son of the woman who lost the ring posted this nice message on the Lostmystuff website. What an icredible feeling it was to find that treasured ring and to see the look on her face when I presented it to her, that was all the reward that I needed. Her son’s message is below.

Today was a fantastic day for my mom as she recovered her lost ring thanks to the time, skill and generosity of your group member Roger B. My mom lost her ring a week ago in her backyard when she was raking leaves. Both she and I searched for it with no luck.

f ring

When I was searching the web trying to find a place to rent a metal detector I came across the Lost My Stuff Group website (Lostmystuff.net) and posted a lost item report. I was subsequently contacted by about 10 of your group’s members, including Roger, with offers to help search for the ring. I was overwhelmed by the charitable volunteerism offered by your group – it was really wonderful!

Because Roger lives in the next town over from us, I accepted his kind offer to come by and search for the ring. He came today with a couple metal detectors and we set out searching my mom’s backyard. After about an hour we had covered almost all the area where we thought it might be.

At this point, I didn’t have much hope that we would find the ring, until I heard the exclamation of joy from my mother!!

Roger had found the ring with his metal detector and then plucked it from the lawn after seeing it with his eyes. I can’t tell you how happy my mom and I are that Roger was able to find the ring as it contained a small engagement diamond that my deceased dad had given to her. She had been sick at heart at its loss but she is now so relieved and happy.

I want to express my deepest gratitude to Roger, your Group, and the other members who graciously offered to search for the ring. We wouldn’t have found it without you. It’s really a wonderful organization that you have providing such a valuable service.

Gratefully, Nicholas A.

Roger and the Happy Owner

found ring

Lost an item? Rings, keys, phone, etc. go to Lostmystuff.net and file a missing item report, it’s easy & free!

Categories: Found & Returned, Pictures of my Metal Detecting Finds | Tags: , , , , , | Leave a comment

Cleaning your finds

SILVER COIN FINDS

A question I hear over and over is, what's the best way to clean my metal detecting finds? Unfortunately the answer is not so simple because every find is unique and cleaning your finds must be carefully thought out. In most cases regarding key-date coins and old antique items, you should not clean them.

Even before you get home with your finds consider this; Let's say your at the local park and you get a nice tone while metal detecting and cut a plug, out pops a silver dime but it's caked in dirt. You're excited and really curious about what kind of dime is it, what date is it, and you swipe your finger across the dime ever so gently, at least you think it was gently, well you may have just ruined a great find (see scratches on the dime below for an example).

Barber Dime found metal detecting

You suddenly realize that the dime you just dug up is a 1916D Mercury Dime, the king of Mercury Dimes, excited even more you get home put it under running water to get the loose dirt off and then put it in a coin holder for sending it out to be graded.

A couple weeks go by and you get the graded coin in the mail and excited you tear the package open and you find the dime has a reduced grade due to surface scratches and your potentially $2000 coin is now worth about half that or even less. Now if you cleaned the coin by soaking it in vinegar or scrubbed it with a toothbrush and baking soda, chances are it would be returned as "ungradeable," so don't even consider it.

What I do is, when I head out for land metal detecting I bring a plastic pill bottle half filled with olive oil. If I dig a silver coin I will blow off whatever dirt that I can and then put it in the pill bottle with the olive oil. Olive oil will not harm your silver coins. REMEMBER, never rub a silver coin find with your fingers, that will scratch the surface.

If you place your silver coin finds in your finds pouch just the movement while you continue to hunt can cause the dirt, gravel & sand in your pouch to scratch them. If I'm saltwater beach hunting most silver coins come out of the sand very "crusty" so cleaning isn't really an issue so I just put them in my finds pouch.


So, in summary, do not field clean (swipe finger across to remove dirt) any silver coins you find while metal detecting. If you are not sure of the date of the coin you dug put it in a seperate bottle with olive oil or put them in tissue or separate pocket of your finds pouch. When you get home hold it under running water and if you still have caked on dirt you can gently remove what you can with a toothbrush but don't scrub it. Once you know what you have you can decide if you want to clean it any further.

Once I know it is not rare or a key-date I usually use a toothbrush and baking soda or I sometimes tumble all of my non key-date silver coins and clad. I may even gently (a few minutes) hit it with electrolysis, but again only if it's not a key-date, and then tumble.


COPPER COIN FINDS

Metal detecting found penny

Much of what I recommended for silver coins applies to coppers also. For example, after pulling a copper coin from the ground try to resist the temptation to swipe your finger across it to try and read the date or identify it. Granted, copper coins are not as soft a metal as silver but why risk it?

Some will say to also put your Large Cents, Eagles and Indians in olive oil but I don't recommend that since it may darken coppers. I'm not really sure about that but I would rather err on the side of caution.

What I do with Large Cents is again, blow off whatever dirt I can and then place it in between tissue paper before putting it in a pocket or finds pouch.

When I get home I run warm water on it and pick at it with a wooden toothpic to see if I can read a date. If I find the date and it is a rare or key-date I will just soak it in warm water and some dish soap like Dawn.

Then after a day of that gently with a toothbrush and toothpic clean it a little further but not to rough. If it is a rare or key-date copper and you eventually want to sell or grade it, you don't need or want to clean it beyond that.

If you are not concerned with preserving it then clean away, however I do not recommend vinegar, ammonia or peroxide being used on your copper coin finds. That will drastically change not only the favorable patina but also could damage the coin surface.


Categories: How to clean finds, Metal Detecting Tips | Tags: , , , , , | Leave a comment